Security Tools for Network Engineers
Table of Contents
When you spend enough time as a network engineer or admin, the same tool names keep appearing: Nmap, Wireshark, tcpdump, Nessus, Greenbone, Burp Suite, Shodan, Suricata, Snort, Kali Linux, Metasploit, Hashcat, Cobalt Strike, and many more.
Some of them belong in my basic toolkit. Others are specialist tools for AppSec, forensics, blue team, or red team work. Others are worth knowing so you can classify them correctly, even if you would never use them in production yourself.
The important point is this: a security tool is not automatically a hacker tool. It depends on the mandate, the target system, authorization, documentation, and purpose.
A tool is not made serious or dangerous by its name, but by the context in which it is used.
This article is therefore not a ranking and not an attack guide. I am writing it from the perspective of a network engineer who wants to understand which tools help in daily work, which belong more in security teams, and where you have to be deliberately careful.
All examples in this article belong on your own systems, lab environments, staging systems, or explicitly authorized tests. Once a third-party target without permission is involved, the line has been crossed.
The installation examples are deliberately Linux-focused, specifically Debian, Ubuntu, Kali, or similar systems with apt. I leave other platforms out on purpose because a professional analysis setup becomes clearer when the base is a cleanly separated Linux system.
The right working environment
For serious network analysis, I would not use my normal MacBook Air. A daily machine is too close to mail, customer data, browser sessions, passwords, private files, and production access for the kind of separation I want during security testing.
A dedicated Linux machine or Linux workstation is more professional. The tools run natively, network cards are easier to address, packet captures are simpler, and interfaces, routing, VLANs, and capture permissions can be controlled much more directly. Many tools still belong in VMs, because snapshots, separated projects, and clean rollback points save a lot of trouble in security work.
A realistic setup for professional analysis would look like this for me:
- Daily machine: communication, documentation, tickets, password manager, admin portals.
- Linux analysis machine: encrypted disks, packet captures, network diagnostics, local labs, longer scans, enough RAM for several VMs.
- Security VMs: Kali or Parrot for red-team/AppSec tools, Debian/Ubuntu for admin and blue-team work, snapshots before risky tests.
- Network hardware: additional USB Ethernet adapter, 2.5G/10G if needed, a small managed switch with VLANs and a mirror/SPAN port.
- Wi-Fi hardware: USB Wi-Fi adapter with Linux support for monitor mode and packet injection, only for authorized Wi-Fi tests.
- Isolated lab: test targets, intentionally vulnerable systems, own domains, own staging websites, separated project folders.
- Customer environment: only with approval, documented scope, defined time window, and a clear contact person.
If you take it very seriously, you also have separate network segments: a management network, a lab network, a sensor with Suricata or Zeek, and a central log platform. That may sound like overkill, but that is exactly the point: good security work is not created only by tools, but by clean separation.
For Wi-Fi analysis, a VM is often only half the solution; clean USB passthrough to the right adapter is what matters.
That is closer to what professional security people actually use: not a magical “hacker laptop”, but a controllable Linux setup with separated work areas, reproducible labs, and tools that can be removed or rolled back cleanly.
Separate the layers first
Before talking about individual names, the layers need to be separated. Otherwise everything sounds the same, even though these are completely different things.
A tool is a single utility with a clear task. Nmap scans networks, tcpdump records packets, Lynis checks a system for hardening points.
A framework is an extensible tool environment. Metasploit, Recon-ng, and Volatility bring modules, workflows, and their own logic.
A platform bundles multiple functions, users, data sources, reporting, and integrations. Examples include Splunk, Censys, Maltego, Nessus, InsightVM, Core Impact, or Cobalt Strike.
A distribution is a complete operating system with many preinstalled tools. Kali Linux and Parrot OS are not individual tools, but working environments.
A security concept is even more abstract. SIEM and IDS/IPS are not programs, but system classes. Splunk can provide SIEM functions, while Snort and Suricata are concrete IDS/IPS engines.
Visibility: the most important foundation
As a network engineer, I do not start with exploits. I start with visibility. Which systems exist? Which ports are open? Which packets really cross the wire? Which services respond? Which logs do I even have?
Nmap
Nmap is one of the most important tools for me, not because it is spectacular, but because it answers a simple question: what is reachable on the network?
On Debian, Ubuntu, or Kali, I install Nmap through the package manager.
sudo apt install nmap
In practice, I use Nmap for inventory, firewall checks, and service verification. I want to know whether a host really exposes only the expected ports, whether a service is still reachable after a change, or whether an old test service has been forgotten somewhere.
# Version check against an explicitly approved Nmap test target
nmap -sV scanme.nmap.org

# Check only specific ports
nmap -Pn -p 22,80,443 scanme.nmap.org

# Save results cleanly for later comparison
mkdir -p scans
nmap -sV -oA scans/scanme-baseline scanme.nmap.org

# Scan your own internal network only with permission
nmap -sV 192.168.1.0/24
I would never run Nmap blindly against third-party networks. But in your own network it is a very good tool for replacing assumptions with facts.
tcpdump
tcpdump is the plain, direct form of packet capture. If I want to see quickly on a server or firewall whether packets arrive, tcpdump is often faster than any GUI.
On many Linux systems, tcpdump is already installed. Otherwise it comes through the package manager.
sudo apt install tcpdump
Typical uses are DNS debugging, routing problems, firewall rules, MTU issues, or the question: “Does the client even reach the server?”
# Show interfaces
sudo tcpdump -D

# Watch DNS traffic on an interface
# Interface names vary by Linux system, for example eth0, ens18, or wlan0
sudo tcpdump -i eth0 -nn port 53

# Capture traffic to a specific host
sudo tcpdump -i eth0 -nn host 192.0.2.10

# Save a capture for Wireshark
sudo tcpdump -i eth0 -nn -w debug.pcap
The most important operational point: captures can quickly contain sensitive data. I store them only as long as necessary, do not share them carelessly, and prefer narrow filters over broad ones.
Wireshark
Wireshark is the tool I reach for when tcpdump is no longer enough. tcpdump shows me that packets are there. Wireshark helps me understand what is happening inside the protocols.
On Debian, Ubuntu, or Kali, I install Wireshark through the package manager. On analysis machines, you need to decide deliberately who gets capture permissions, because packet captures are powerful.
sudo apt install wireshark
I mainly use Wireshark for HTTP/TLS errors, DNS problems, TCP retransmissions, VoIP issues, SMB or LDAP debugging, and for analyzing pcaps from firewalls or servers.
In practice, I often work like this: first capture narrowly with tcpdump, then open the file in Wireshark. That reduces noise and avoids having to analyze huge captures.
Shodan
Shodan is not classic local software, but a search engine for exposed internet systems. From a network engineer’s perspective, Shodan is interesting because it shows what your infrastructure may look like from the outside.
You use Shodan through the web interface or API. Serious use requires an account. I would not see Shodan as an “attack tool”, but as a mirror: which systems show up publicly even though maybe they should not?
In practice, I search for my own domains, IP ranges, certificates, product banners, or forgotten services. Shodan is especially interesting for VPN gateways, remote-access systems, ICS/IoT, old web servers, and wrongly exposed management interfaces.
Censys
Censys is in a similar world to Shodan, but is more focused on internet exposure, certificates, hosts, and attack-surface management.
You access it through the web platform or API. For security teams, Censys is useful when they want to understand which certificates, IPs, services, or domains are publicly visible.
The practical value is less about “searching for the sake of searching” and more about reconciliation: does what is visible externally match our inventory? If Censys finds systems that do not exist in the internal asset management, you have a process problem.
Maltego
Maltego is an OSINT and link-analysis platform. It is not a scanner, but more a tool for making relationships visible: domains, IPs, people, organizations, email addresses, social profiles, infrastructure.
You install Maltego as a desktop application and use different data sources and transforms depending on the edition. I rarely need it for pure network administration. For threat intelligence, fraud, investigations, or more complex OSINT questions, it is very strong.
In use, it is less about single commands and more about clean questions: which domains belong to an organization? Which certificates and name servers appear? Which infrastructure repeats? Where are relationships hidden inside a table?
theHarvester
theHarvester is a classic OSINT and recon tool. It collects publicly visible information such as email addresses, hosts, subdomains, or banners from different sources.
On Kali it is often available directly. Otherwise you install it through the project repository or your distribution’s package sources.
# Use only against your own or authorized domains
theHarvester -d example.com -b crtsh
Data sources change regularly. Some sources eventually stop returning results, others require API keys or have rate limits. If an example command comes back empty, that does not automatically mean there are no externally visible traces.
I would use theHarvester mainly to check my own external view: which email addresses are publicly tied to a domain? Which subdomains appear? What could an attacker see without logging in?
Recon-ng
Recon-ng is an OSINT framework with workspaces, modules, and a workflow that feels a little like Metasploit, but for reconnaissance.
You typically install it through Git or use it in security distributions. The difference from a single-purpose tool is structure: you create workspaces, use modules, collect data, and can process results more systematically.
I see Recon-ng more with OSINT analysts, red teams, and security engineers than in normal admin work. It is worth it when you need repeatable recon workflows and not just a one-time domain lookup.
Amass
Amass is very useful for external asset discovery and subdomain enumeration. Especially in larger environments, this matters because forgotten subdomains are often more interesting than the main website.
You get Amass through OWASP, GitHub, package managers, or security distributions. I would start with passive enumeration because it is less invasive.
# Passive enumeration of your own or authorized domain
amass enum -passive -d example.com
With Amass, I would always quickly check the local version and current syntax. The project is maintained, and across major versions flags, data sources, and workflows can change.
In practice, Amass is interesting when you want to know whether old test environments, forgotten staging systems, or abandoned DNS records are still publicly visible.
OSINT Framework
OSINT Framework is not a program, but a curated link collection. That is exactly what makes it useful: you quickly find suitable sources for domains, email addresses, social media, images, phone numbers, public registers, and many other OSINT areas.
You install nothing. You use the website as orientation.
For network engineers, it is not relevant every day. But if you want to understand the external traces of an organization, it helps you find the right sources instead of randomly building search-engine queries.
Gobuster
Gobuster is an enumeration tool for web paths, DNS, virtual hosts, and similar structures. In web and infrastructure tests, it is useful for finding forgotten paths or subdomains.
I list it under visibility because it answers exactly that question: what is reachable even though it may not be documented? It also touches Web Application Security, of course.
On Debian, Ubuntu, or Kali, Gobuster comes through the package manager or through Go if you need a newer version.
sudo apt install gobuster
A sensible example belongs against your own staging system or lab:
# Lab or staging target, not third-party websites
gobuster dir -u https://staging.example.test -w wordlists/small.txt

# VHost enumeration in your own lab
gobuster vhost -u https://example.test -w wordlists/vhosts.txt
I would never run Gobuster against third-party websites. Against your own web applications, however, it is a very good reality check: what is reachable although nobody had it on their radar anymore?
Vulnerabilities and hardening
Once visibility exists, the next step is: what is vulnerable, outdated, or badly configured?
Prioritization matters. A CVSS score mainly describes technical severity. EPSS helps estimate how likely exploitation is in practice. The CISA KEV catalog shows which vulnerabilities are already known to be exploited. Good teams combine these signals with their own exposure: internet-facing beats lab server, production beats test system, critical service beats footnote.
Greenbone / OpenVAS
OpenVAS belongs in the Greenbone context today. In practice, people usually mean Greenbone Community Edition or Greenbone Vulnerability Management.
You do not install Greenbone as casually as a small CLI tool. It is a scanner and management stack with feeds, web interface, database, and services. I would use the official community containers or distribution packages for it and not install it “on the side” on some production server.
In use, it is about recurring scans, authenticated checks, reporting, and prioritization. Important: a scanner is not a replacement for patch management. It only shows where you need to look.
Nessus
Nessus is a commercial vulnerability scanner from Tenable. Many admins know it from audits, compliance checks, or regular vulnerability scans.
You get Nessus from Tenable as an installer for the relevant platform. After that, a local service with a web interface runs.
I would use Nessus in a clear scan window, with well-defined target ranges and preferably authenticated scans. Authenticated scans are often more valuable because they do not only guess from the outside, but can check software versions and configurations more precisely.
Lynis
Lynis is a very practical hardening and audit tool for Linux and other Unix-like systems. In this article, however, I am thinking about it clearly from a Linux perspective.
Installation is simple:
sudo apt install lynis
A typical audit runs like this:
sudo lynis audit system
Lynis provides many hints about logging, kernel parameters, SSH, file permissions, package status, malware scanners, and baseline hardening. I do not see it as a tool that “fixes everything”, but as a checklist with technical depth.
HCL AppScan
HCL AppScan is an AppSec product line for web, API, and software security testing. If you still know the name as IBM AppScan, keep the product move to HCL in mind.
You get the commercial editions through HCL. In practice, AppScan belongs more in AppSec and DevSecOps teams than in classic network operations.
What matters is use in the software lifecycle: scans in test environments, API checks, reporting for development teams, and follow-up on findings. Without integration into development and remediation, every AppSec tool quickly becomes just another PDF generator.
InsightVM / Nexpose
Rapid7 Nexpose and InsightVM belong in the vulnerability-management world. Nexpose is the well-known older name, InsightVM the more modern platform perspective with risk, prioritization, and integrations.
You install or obtain it through Rapid7. The real value is not scanning alone, but prioritization: what is truly critical, internet-exposed, exploitable, or business-relevant?
For network engineers, InsightVM is interesting because network segmentation, exposure, and reachability directly influence how dangerous a vulnerability is.
Retina
Retina was a well-known commercial vulnerability scanner. Today, for me, it is mainly a legacy term. BeyondTrust announced its withdrawal from the vulnerability-management market in 2020 and the end of life for the former Retina portfolio.
I would not plan it as a current tool. Retina is interesting at most historically or when documenting legacy environments where old reports or installations still exist.
The practical advice is simple: if a vulnerability-management process still depends on a discontinued scanner today, you should not only replace the tool, but review the whole process.
Web Application Security
Web tools are especially dual-use. The same technique you use to test your own application can be misused against third-party applications. That is why clear scopes, test windows, and permissions always belong here.
Burp Suite
Burp Suite is one of the most important tools for Web Application Security. It sits as a proxy between browser and application, makes HTTP requests visible, and allows testing, replay, and analysis.
You install Burp through PortSwigger. The Community Edition is enough for learning and manual basics. Professional is much stronger for professional tests.
The typical workflow is this: configure the browser to use Burp as a proxy, install the test certificate in the browser, open the application in a test environment, and analyze requests. I would not show attack chains in the article, but for legitimate AppSec work Burp is almost standard.
ZAP
ZAP is a free web-app scanner and intercepting proxy. “OWASP ZAP” used to be the common name; today the project itself points out that it is simply ZAP or ZAP by Checkmarx.
You install ZAP as a desktop application or use it in CI/CD-adjacent setups. For teams with an open-source focus, it is a very good entry into DAST.
In practice, I use ZAP for learning environments, internal web checks, and automated baseline tests against staging systems. Active scans never belong against third-party targets.
Nikto
Nikto is a web-server scanner for known misconfigurations, dangerous files, old server versions, and typical web-server problems.
It is available in many distributions:
sudo apt install nikto
An example belongs in your own lab or staging:
nikto -host https://staging.example.test
Nikto is often loud and not especially subtle. That is exactly why I like it for baseline checks: if Nikto finds things on your own web server, you should take them seriously.
WPScan
WPScan is specialized for WordPress. For WordPress site operators, it is interesting because WordPress security depends heavily on core, plugins, themes, and configuration.
On Linux, you typically install WPScan through RubyGems, as a container, or through provided packages. For meaningful results, you often need API access to the vulnerability database.
A defensive example belongs against your own staging or production site with permission:
wpscan --url https://wp-staging.example.test
I would use WPScan especially after plugin changes, larger updates, or before go-lives. But after that, someone still needs to assess the results. Scanner output is not a finished decision.
SQLMap
SQLMap automates SQL injection tests. It is a powerful tool with very clear misuse potential.
You get SQLMap through the official project, GitHub, Kali, or package managers. In a public blog, I would deliberately not show operational SQLMap examples. The tool is too close to real exploitation.
SQLMap is legitimate in an authorized AppSec test when an application is in scope and the tester needs to verify whether a suspected SQL injection is actually exploitable. For normal admins, it is usually more important to understand what SQLMap checks than to run it themselves.
AppSpider
AppSpider is a DAST product from the Rapid7 world. It belongs more in enterprise AppSec than in the small toolkit of a network admin.
You obtain it through Rapid7. In use, it is about crawling, scans, authentication, reporting, and integration into security processes.
The practical value lies in testing web and mobile applications repeatedly. As with AppScan, the tool is only as good as the process that feeds findings back to developers.
Password and authentication checks
Password tools are sensitive because they are very useful in legitimate audits, but can be misused directly. I would use them only with clean authorization, isolated data, and clear documentation.
John the Ripper
John the Ripper is a classic for password audits and recovery. In legitimate scenarios, you use it to check whether your own password hashes can be cracked quickly with simple wordlists or rules.
Installation:
sudo apt install john
A defensive lab example:
# Use only with authorized test hashes
john --wordlist=policy-test.txt hashes.txt
john --show hashes.txt
For me, John is useful for testing password policies realistically. A policy is convincing only when it survives simple cracking tests.
Hashcat
Hashcat is strong when GPU power comes into play. It is relevant for large password audits, recovery cases, and security teams.
Installation differs by platform. On many systems, Hashcat comes through package managers; serious GPU setups need matching drivers.
sudo apt install hashcat
An example belongs only in an authorized lab:
# Example mode only with your own test hashes and your own wordlist
hashcat -m 0 hashes.txt policy-test.txt
The operational point is less the command than the consequence: if Hashcat finds weak passwords quickly, that is a signal for better MFA, better password rules, password blocklists, and less password dependency.
Ophcrack
Ophcrack works with rainbow tables and is mainly historically relevant for older Windows hash scenarios.
You get it through the project site or old packages. In modern environments, I would not choose it as a primary audit tool.
I mention Ophcrack more to show how password audits have evolved. Modern passwords, modern hashing methods, and long passphrases shift the focus strongly toward John, Hashcat, MFA, and credential hygiene.
Hydra / THC-Hydra
Hydra, or THC-Hydra, is an online login audit tool. It tests credentials against network services.
You get it through Kali, package managers, or the project repository. I deliberately would not publish example commands here. Online login tests are very close to credential attacks, create logs, can lock accounts, and are clearly problematic without a mandate.
Hydra is legitimate only in narrow tests: your own systems, defined accounts, clear rate limits, test windows, approval from the system owner, and monitoring. In normal admin work, it is often more sensible to fight weak passwords offline through hash audits and centrally through identity controls.
Medusa
Medusa is in the same category as Hydra: parallelized login tests against network services.
Installation is through package managers or the repository. Here too, for me: no public example commands for real protocols and logins.
If a red team uses Medusa, it does so only within scope and with clear agreement. For blue teams, it is more important to detect such patterns: many failed logins, distributed sources, unusual protocols, account lockouts, MFA prompts.
Cain & Abel
Cain & Abel is a historical Windows tool for password recovery, sniffing, and ARP spoofing. Today I would no longer recommend it as a practical tool.
If you encounter it, it is more likely in old training materials, historical tool lists, or very old lab environments. For modern work, it has been replaced by better, maintained, and more safely classifiable tools.
Its value today is mostly historical: it shows how much Windows security, network segmentation, EDR, and password protection have changed.
Wireless Security
Wireless tools depend especially on hardware, drivers, radio environment, and law. I would perform Wi-Fi audits only in my own networks or clearly authorized customer environments.
Aircrack-ng
Aircrack-ng is a suite for Wi-Fi security audits. It can analyze captures, check Wi-Fi configurations, and make weaknesses visible.
You get Aircrack-ng through package managers, Kali, or the project site.
sudo apt install aircrack-ng
I would not show attack steps against access points here. Aircrack-ng makes sense in your own lab to understand why weak Wi-Fi passwords, old encryption, or poorly configured WPS functions are problematic.
Wifite
Wifite automates Wi-Fi audit workflows and uses other tools in the background. That is exactly why it is convenient, but also sensitive.
You get it through Kali or the project repository. For learning environments, it can help understand workflows. For professional audits, I would still want to know which tools do what in the background.
I do not see Wifite as a daily admin tool, but as a lab or red-team tool with very clear scope.
Kismet
Kismet is interesting for wireless monitoring, survey, and detection. It detects Wi-Fi networks, clients, radio activity, and can help find rogue access points.
Installation is through packages or project sources. Depending on the setup, you need suitable Wi-Fi hardware and drivers.
In practice, Kismet is useful for blue teams and wireless engineers: which access points appear? Are there unknown devices? What does the radio environment look like? Which clients talk where?
AirSnort
AirSnort belongs in WEP history. It was one of the tools that showed why WEP was not cryptographically viable.
Today I would not install AirSnort except for historical research. Modern Wi-Fi security has different problems: WPA2/WPA3, weak passphrases, enterprise auth, certificates, rogue APs, evil twins, segmentation.
The practical value is therefore not “use it”, but “understand why old security does not stay security forever”.
NetStumbler
NetStumbler was a Windows tool for early Wi-Fi discovery and site-survey scenarios.
Today it is mostly legacy. Modern operating systems, Wi-Fi standards, and driver models have greatly reduced its relevance.
If I analyze Wi-Fi environments today, I would rather look at current survey tools, Kismet, vendor tools, or professional Wi-Fi planning software.
Reaver
Reaver belongs in the WPS context. WPS was convenient, but problematic for security, especially with PIN-based methods.
You get Reaver through Kali or forks. I would not publish operational WPS attack examples.
The practical lesson is clear: disable WPS, keep routers current, use strong Wi-Fi passphrases, and segment Wi-Fi clients sensibly. You do not need to use Reaver in daily work to understand the consequence.
Blue team, monitoring, and detection
Blue-team tools look less spectacular than red-team tools, but they decide whether you notice an incident at all.
SIEM
SIEM is not a single tool, but a system class: collecting, normalizing, correlating, searching, alerting, and preserving logs for investigations.
So you do not “install SIEM”, you choose a platform: Splunk, Elastic Security, Microsoft Sentinel, QRadar, LogRhythm, or others.
For network engineers, SIEM is relevant because network devices, firewalls, VPNs, DNS, proxies, and IDS/IPS provide enormous signal sources. Without this data, many attacks remain only a gut feeling.
Splunk
Splunk is a data and analytics platform frequently used in security environments as a SIEM foundation or with Splunk Enterprise Security.
You install Splunk as a server/indexer/search-head architecture or use cloud offerings. In practice, everything starts with data: which logs arrive? Are they time-correct? Are fields normalized? Are there useful dashboards and alerts?
For network engineers, firewall logs, VPN logs, DNS logs, proxy logs, and authentication data are especially valuable.
Elastic Stack
The Elastic Stack classically consists of Elasticsearch, Logstash, and Kibana, now extended with Beats, agents, and Elastic Security.
You install it yourself, use containers, or Elastic Cloud. The stack is powerful, but operations, storage, retention, parsing, and permissions must be planned cleanly.
I often see Elastic as a more flexible, engineering-heavy alternative for logs, search, dashboards, and security use cases. You get a lot of control, but also a lot of operational responsibility.
IDS/IPS
IDS and IPS are system classes. IDS detects, IPS can additionally block.
For network engineers, the important point is: an IDS/IPS is only as good as placement, rules, tuning, and telemetry. A sensor in the wrong place sees nothing. A badly tuned system produces only noise.
I would first clarify: which links should be monitored? North-south or east-west? Alerts only or inline blocking? Who maintains rules? Who reacts to hits?
Suricata
Suricata is a modern IDS/IPS/NSM engine. It is strong in network telemetry, protocol analysis, and EVE JSON logs.
Installation:
sudo apt install suricata
A harmless example is analyzing an existing pcap file:
mkdir -p suricata-logs
suricata -r sample.pcap -k none -l ./suricata-logs
In production environments, the real topics are sensor placement, rule sources, performance, false positives, and handoff to a SIEM or log platform.
Snort
Snort is a well-known IDS/IPS classic. Many security people started with Snort rules and signatures.
Installation is through packages or official sources. A safe entry point is again pcap analysis in the lab, not inline blocking in production. Important: modern Snort 3 setups use Lua configurations such as snort.lua; old Snort 2 examples with snort.conf should not be copied blindly.
# Simple Snort 3 entry with a pcap file
snort -r sample.pcap

# Example with alert output and Snort 3 configuration
snort -c /usr/local/etc/snort/snort.lua -r sample.pcap -A alert_fast

# Alternatively in the lab with an explicit local rule file
snort -R local.rules -r sample.pcap -A alert_fast
Snort is especially helpful for understanding signatures: which patterns do I recognize in traffic? What is a real hit? What is a false positive?
Zeek
Zeek is not a classic IDS that primarily emits signature hits. It is a network-security-monitoring framework that translates network traffic into structured logs: connections, DNS, HTTP, TLS, files, certificates, SSH, DHCP, and much more.
You install Zeek through packages, official repositories, or as part of larger sensor setups. A simple lab entry is analyzing a pcap file:
zeek -r sample.pcap
ls *.log
For network engineers, Zeek is extremely valuable because it turns packet traffic into an investigable timeline. Suricata also provides strong protocol metadata through EVE JSON, but is more often thought of as rule- and alert-centered. Zeek is stronger where you want to understand, hunt, and correlate network behavior over time.
NetFlow / IPFIX
NetFlow and IPFIX are not packet captures, but flow metadata. You see, for example, source, destination, ports, protocol, duration, and data volume of a connection, but not the packet content itself.
For network engineers, this is extremely valuable because it lets you observe large networks without capturing everything completely. Typical questions are: which systems suddenly talk unusually much to the outside? Which internal hosts build connections to unexpected countries? Where does east-west traffic appear that was not expected?
You get such data depending on the environment from routers, switches, firewalls, sensors, or dedicated flow collectors. For security, flow telemetry is often the middle ground between “I only have logs” and “I store every packet”.
Full Packet Capture
Full Packet Capture means that network traffic is recorded completely as pcap or in a specialized platform. That is powerful, but expensive in storage, privacy, and operations.
I would not enable Full PCAP everywhere permanently. It makes sense at selected points: internet edge, critical server segments, lab, incident-response windows, or high-risk environments. Tools and platforms such as Arkime, Stenographer, or Security Onion can help make captures searchable and operationally useful.
The big advantage: when an incident happens, you do not have to reconstruct only from logs, but can actually inspect selected sessions afterward. The big downside: you carry responsibility for very sensitive data.
OSSEC
OSSEC is a host-based intrusion-detection system. It looks at hosts: logs, file-integrity monitoring, rootkit detection, policy checks, and active response.
You install OSSEC through packages or project sources. Productive use needs architecture: manager, agents, rules, alerts, and processes.
For me, OSSEC is interesting because it does not only look at network traffic. Many attacks become really visible only on the host: new files, logins, suspicious processes, changed configurations.
Short detour: OSCO, OSSEC, or OSSIM?
OSCO is not a name I would treat as an established security tool in this context. If someone says “OSCO” around SIEM, IDS/IPS, Snort, Suricata, and Splunk, I would first check whether OSSEC or perhaps OSSIM was meant.
I would therefore not install or recommend OSCO, but clarify the term. In security, this is not a detail: a wrong tool name can mean someone copied a source without checking it.
Forensics and incident response
Forensics tools are not there to “attack”. They help you understand what happened after an incident.
The Sleuth Kit
The Sleuth Kit is a collection of command-line tools for file-system and disk analysis.
Installation:
sudo apt install sleuthkit
You use it in DFIR cases to examine images, analyze file-system structures, and extract artifacts. It is more toolbox than pretty interface.
Autopsy
Autopsy is the graphical platform around digital forensics and is strongly based on The Sleuth Kit.
You install Autopsy through the project site or packages. In use, you create cases, import images, analyze artifacts, timelines, files, browser data, and many other traces.
For admins, Autopsy is not needed daily, but in incident-response contexts it is very valuable.
Volatility
Volatility is a framework for memory forensics. It analyzes RAM images and helps find processes, network connections, DLLs, handles, malware traces, or other artifacts.
Installation today is typically through Python/Pip or packages, depending on the version.
A typical lab example:
vol -f memory.raw windows.info
vol -f memory.raw windows.pslist
Its value is that some attacks are more visible in memory than on disk.
Guymager
Guymager is a forensic imaging tool. It creates bit-exact images of storage media.
You often find it in forensic Linux distributions or package sources. In productive evidence situations, not only the tool matters, but also chain of custody, write protection, hashes, and documentation.
For normal admins, Guymager is rarely daily work. For DFIR, it is foundational.
Foremost
Foremost is a file-carving tool. It can reconstruct files from raw data based on headers and footers.
Installation:
sudo apt install foremost
A lab example:
foremost -i disk-image.raw -o recovered-files
That is useful when files have been deleted or file-system metadata is damaged. It does not replace clean forensic methodology.
Binwalk
Binwalk is strong for firmware analysis. For routers, IoT devices, and embedded systems, this is exciting because firmware often contains file systems, configurations, or key material.
Installation:
sudo apt install binwalk
Lab example:
binwalk firmware.bin
binwalk -e firmware.bin
For network engineers, Binwalk is interesting if you want to understand device security. For production work, however, you need legal clarity: simply taking apart firmware from third-party devices is not automatically harmless.
Red team and high-risk dual-use
These tools can be legitimate in professional red-team engagements. At the same time, they are closer to real exploitation, phishing, or command-and-control. That is why I explain them, but I do not turn this into an operating manual.
Metasploit Framework
Metasploit is an exploitation framework. It helps verify vulnerabilities in a controlled test and reproduce attack paths.
You get Metasploit through Rapid7, Kali, or package sources.
msfconsole
I would deliberately not show more workflow than that in a general blog post. Used professionally, Metasploit belongs in a lab or a clear pentest scope. For blue teams, it is also useful for testing detection against known techniques.
ExploitDB
ExploitDB is not a software suite, but a database for exploits and proofs of concept.
You use it through the website or search tools such as searchsploit in Kali.
The defensive value is high: if public exploit code exists for a vulnerability, that influences patch priority, exposure assessment, and detection. You do not need to run every exploit to understand its risk value.
Core Impact
Core Impact is a commercial pentest platform. It targets professional teams that perform structured, authorized tests.
You obtain it through the vendor. Installation, licensing, and use are enterprise topics, not “quickly install a tool”.
I would see Core Impact more as a platform for organized tests: planning, execution, reporting, and follow-up. The value lies in process and evidence.
Cobalt Strike
Cobalt Strike is a platform for adversary simulation and red-team operations. It is one of the most sensitive tools in this article.
You officially get it only through the vendor and licensing. That is exactly how it should be. Cobalt Strike does not belong on private tinkering machines or in unclear lab environments.
I would publish no commands or usage patterns. The important point is classification: in professional hands, Cobalt Strike can help test blue-team detection realistically. In the wrong hands, it is a serious misuse tool.
GoPhish
GoPhish is a framework for phishing simulations and awareness training.
You install it as a server application, often in an isolated environment. Before productive use, you need approvals, privacy clarification, target groups, a communication plan, and clear evaluation.
I would not see GoPhish simply as a “phishing tool”, but as an awareness-measurement tool. It is serious only when the organization knows what is being tested and how results will be handled.
HiddenEye
HiddenEye is a phishing toolkit with a strongly misuse-adjacent orientation.
I would not recommend it as a normal enterprise tool. If it appears at all, then in malware/phishing research or in very controlled training environments.
For admins, it is more important to know such toolkits exist than to install them. Defense means: MFA, phishing-resistant methods, good mail filters, browser isolation, reporting processes, and awareness.
SocialFish
SocialFish is similar to HiddenEye in the phishing-toolkit area.
Here too, I see hardly any legitimate normal admin value. In a serious awareness program, I would rather use GoPhish or commercial awareness platforms because reporting, consent, templates, and processes are cleaner there.
The security value lies in classification: when blue teams know how easy such toolkits are to obtain, they better understand why password-only MFA and employee training alone are not enough.
EvilURL
EvilURL deals with homograph and lookalike domains. The topic is relevant for brand protection and phishing defense.
You can use such tools defensively to detect possible deceptive domains or build awareness examples. Operationally, you have to be very careful because generating deceptive domains can also be misused.
For network engineers and admins, the key consequence is: DNS monitoring, domain monitoring, DMARC/DKIM/SPF, clear communication domains, and good user guidance.
Evilginx
Evilginx is an adversary-in-the-middle phishing framework. It can show why classic MFA is not automatically phishing-resistant.
I would not publish installation or usage commands. The tool is too close to real credential and session attacks.
It is legitimate in very controlled red-team tests when a company wants to verify whether its identity and session protections hold. For defense, the lesson is clear: FIDO2/WebAuthn, Conditional Access, device binding, token protection, good login telemetry, and quick response to suspicious sessions.
Distributions as working environments
A distribution is not a tool. It is the workbench.
Kali Linux
Kali Linux is a security distribution with many preinstalled tools for pentesting, forensics, reverse engineering, and security research.
You install Kali as a VM, live system, or on dedicated hardware. I would use it as a VM on a Linux host in most cases, not as a normal daily operating system.
The practical value is that many tools are already installed and aligned. The downside: this makes it tempting to run things you do not understand. Kali does not replace understanding.
Parrot OS
Parrot OS is also a security- and privacy-oriented distribution. It is suitable for pentesting, OSINT, forensics, and general security work.
As with Kali, I would see Parrot more as an isolated working environment: VM, lab, clear snapshots, no mixing with private data or production customer access.
The difference between Kali and Parrot is less important than the question of whether you use the tools inside responsibly.
Security Onion
Security Onion is the defensive sibling in this tool world. While Kali and Parrot are strongly associated with pentesting and security research, Security Onion focuses on network security monitoring, threat hunting, log management, and incident response.
You do not install Security Onion as a normal desktop toy. It is more a sensor and monitoring platform for labs or production security environments. Typical components are network sensors, Suricata, Zeek, log data, dashboards, and workflows for alerting and investigation.
For network engineers, Security Onion is interesting because it shows how individual tools become a detection setup. A single tcpdump answers a momentary question. A well-placed sensor answers over days and weeks what is really happening in the network.
What I would really take away as a network engineer
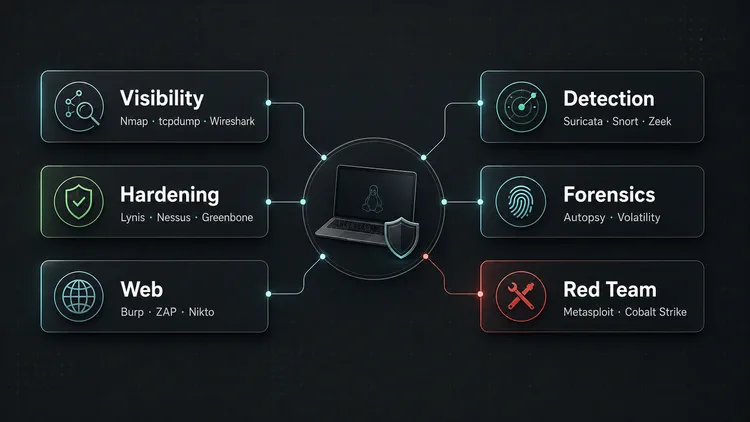
If I had to build a compact toolkit for network engineers, it would look roughly like this:
For visibility: Nmap, tcpdump, Wireshark.
For external attack surface: Shodan, Censys, Amass, theHarvester.
For hardening and vulnerabilities: Lynis, Greenbone/OpenVAS, Nessus, or a comparable vulnerability-management platform.
For web applications: Burp Suite, ZAP, Nikto, WPScan.
For detection: Suricata, Snort, OSSEC, plus a usable SIEM or log stack.
For Network Security Monitoring: Zeek, Security Onion, NetFlow/IPFIX, and Full Packet Capture where needed.
For forensics: Autopsy, The Sleuth Kit, Volatility, Guymager, Foremost, Binwalk.
For red-team work: Metasploit, Cobalt Strike, Core Impact, SQLMap, GoPhish, Evilginx only with mandate, scope, and experience.
And for historical context: Cain & Abel, AirSnort, NetStumbler, Retina, Ophcrack with clear legacy context.
Conclusion
The best security toolkit is not the longest one. It is the one where you know why every tool is in it.
Nmap and Wireshark help me understand a network. Lynis, Nessus, and Greenbone help me make weaknesses visible. Snort, Suricata, OSSEC, and a SIEM help me avoid being blind. Burp, ZAP, and WPScan help with web security. Forensics tools help me do more than guess after an incident. Red-team tools help test defenses realistically, but only with a clean mandate.
For me, that is the real boundary: not “admin tool” versus “hacker tool”, but responsible operation versus unauthorized use.
Until next time,
Joe